
After several other home improvement projects at our new beach house (Fence/Pool/Deck/Landscaping), it was time for me to turn my attention to building a workshop. If you know me, you know I can’t go more than a year or two without having a kit plane project to work on. Even though living at the beach is allowing me a lot more time for fishing, kayaking, bike riding, etc. the old aviation bug was bound to bite again, and it did. I decided to build another Zenith CH650 Zodiac kit plane because it is large enough for Missy and I to fly in comfortably, has good cross-country capabilities, and is easy to build and fly. As far as airplanes go, it’s also fairly inexpensive to build and maintain, and I have quite a bit of experience with this design and construction techniques.
Because of local building and zoning laws, I was limited to a shed that is no more than 150 square feet, so I designed a 12×12 building using SketchUp. This is a very small place to build an airplane, so my goal was to maximize the available space as much as possible by having 8-foot ceilings and a steep roof with large overhead storage lofts. The area should be large enough to build most sections of the plane, though I will certainly have to move it elsewhere for final assembly. After initially designing the building with a Gambrel roof, and even building the required 4 piece trusses, I decided that roof was going to be too difficult to build, mostly because I am so scared of heights. I changed it to a Gamble roof after installing 3 of the 10 trusses. Here is the final design drawing.
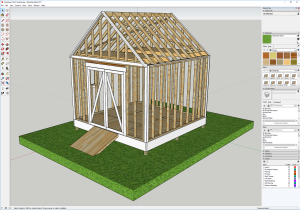
The building would end up having internal bracing using OSB sheets in each corner and hurricane straps to hold the trusses to the top plates and foundation. Everything was built on 16″ centers, and is at least as strong as my house. In the end, the actual building was VERY similar to the drawing, though I did make a few tweaks here and there.
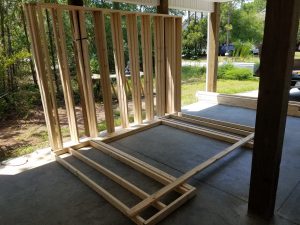
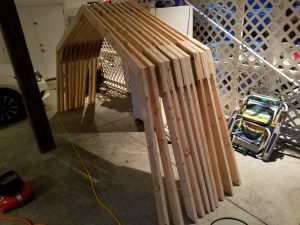
Construction began on August 6, 2017. I did not, yet, have my permit, so I was limited to what I could build under the house. I framed the walls, without the OSB bracing so they would be light enough to move when that time came. A few days later, I built the roof trusses that I would eventually not use.
I received my building permit about 10 days after I applied for it, so it was time to start building. I wanted the foundation to be similar to my house. Since our yard is primarily sand and can flood easily, that means building off the ground is needed. I decided to go with 9 4×4 posts sunk deep into the sand, sitting on top of a crushed rock foundation and mounted in concrete.
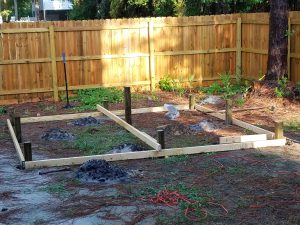
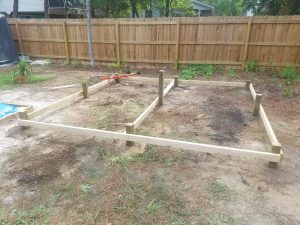
12′ 4×4’s were attached to the foundation to make an elevated skid, and 12′ 2×4’s were placed on 16″ centers to form the floor joists. These are all pressure treated.
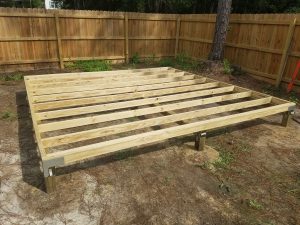
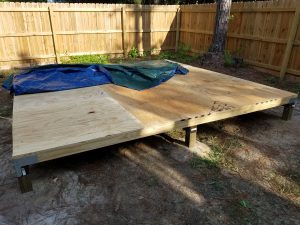
The following week, Missy and I installed the 3/4″ plywood floors. They are not pressure treated, so we did our best to keep water out. That ended up being a losing battle, but a valiant effort.
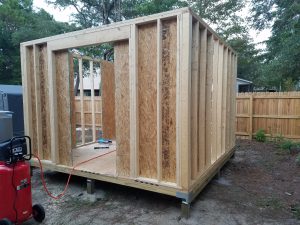
Moving the walls from under the house to the platform was not real pleasant, but Missy and I managed without any help. Standing up the walls and temporarily bracing them only took about an hour.
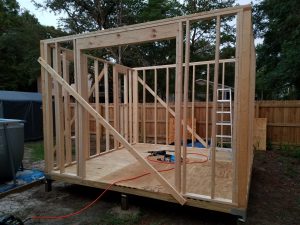
The walls were internally braced with 7/16″ OSB. Even though the exterior sheathing is structural, negating the requirement for internal bracing, I wanted the internal bracing both for added strength (we get hurricanes) and for a place to mount shelves, pictures, drawings, etc.
We started installing the trusses for the Gambrel roof. As it turns out, this was incredibly difficult to do. First off, I am scared of heights, and the top of the roof was well over 15′ above the ground. Second, because we were working so close to fence and pool, it was a major PITA to handle these trusses and get them to stay put while adding more.
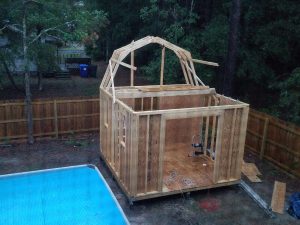
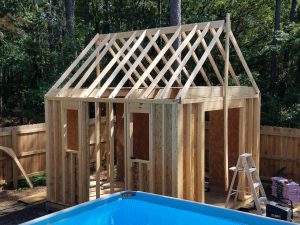
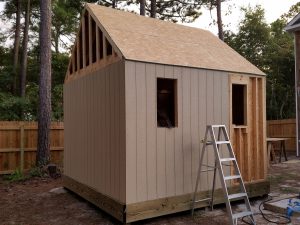
So, before this project got any uglier, and before anyone got seriously hurt, I changed the roof design to a simpler Gamble roof. It would have a steep pitch for maximum storage space in the lofts, and I designed it so that each side used exactly 3 sheets of plywood, with no long cuts required. Thankfully, by brother-in-law, Mike Daniel, sacrificed 3 days of his vacation to help me in the very hot and humid summer sun while doing the roof.
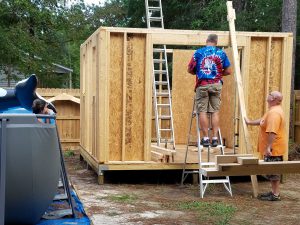
Now it was time to install the exterior sheathing/siding. I used the pre-primed composite sheathing from Lowes for this. I can’t say enough great things about this stuff, though at $30/sheet it is pretty expensive.
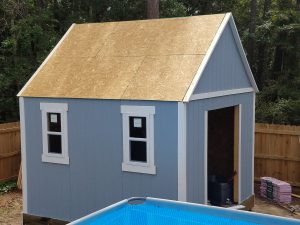
Paint, windows, and trim installed. Almost done! This was September 17, 2017.
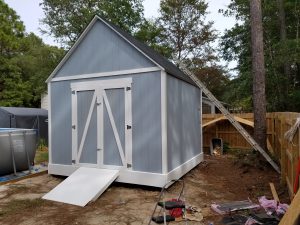
After getting really tired of water getting inside every time it rained, Missy and I struggled to get the roof paper installed. Somehow managed to get it laid down. No more leaks! I did pay a local builder $225 to shingle the roof, which I felt was a very fair price. I turned my attention to completing the doors, entry ramp, trim, and paint.
September 24 was the “done” day. That marked the end of major construction, and of the backyard looking like a construction zone! It would pass inspection a couple of days later.
I needed electrical service, and while I would love to have installed a 50-amp sub-panel in the workshop, I had already spent more money on this project than I had planned. I had to cut a corner here and run a single 20-AMP 120 volt line from the house to the workshop. The 125′ of #10/2 UF-C cable cost over $100 alone, but is certified for direct burial, so long as you go at least 12″ deep. I had to cut a deep trench about 110′ around the pool to the house to bury the cable. I thought I was going to die 🙂 The line feeds into a 20-amp switch that I can use to kill all power to the building. Previously, our pool used an above-ground wire that ran along our fence for power. That wire was removed and the pool now plugs into an exterior outlet on the shed, which looks a whole lot nicer. Behind the building is a small resin shed that holds my air compressor, which I can turn on and off from inside the workshop. This means I won’t go deaf when the compressor kicks on, and the neighbors will probably appreciate the extra quiet as well! I also didn’t lose working space inside to the compressor.
In the end, and less than 2 months after starting the project, I have a very nice workshop where I can build my next kit plane. It’s tight (cozy if you’re in real estate) but will work. The total cost was about $2600, including the $100 or so I wasted trying the Gambrel roof first, and the $225 I paid to have the roof shingles installed. Now that I am moved in, I just need airplane parts to arrive!